Good morning gamers,
The Fellowship is full of powerful heroes – heroes who are in many ways the top of their class for what they do. Who can kill as many models (no matter how high their Defense or Fight Value stats are) as Aragorn? How many archers can out-shoot Legolas? What heroes are as tough to crack as Gimli (okay, there are a few tougher than him, but none are at his cost level)? Who can out-Might Boromir (besides Aragorn and Azog on the White Warg – both of who cost a good bit more than Fellowship Boromir, by the way)?
So when do you put on the Ring? Depending on the gear you’ve
chosen and the heroes you’ve chosen to provide to support Frodo, the answer is
either “when you near the enemy” or “only when you need it”:

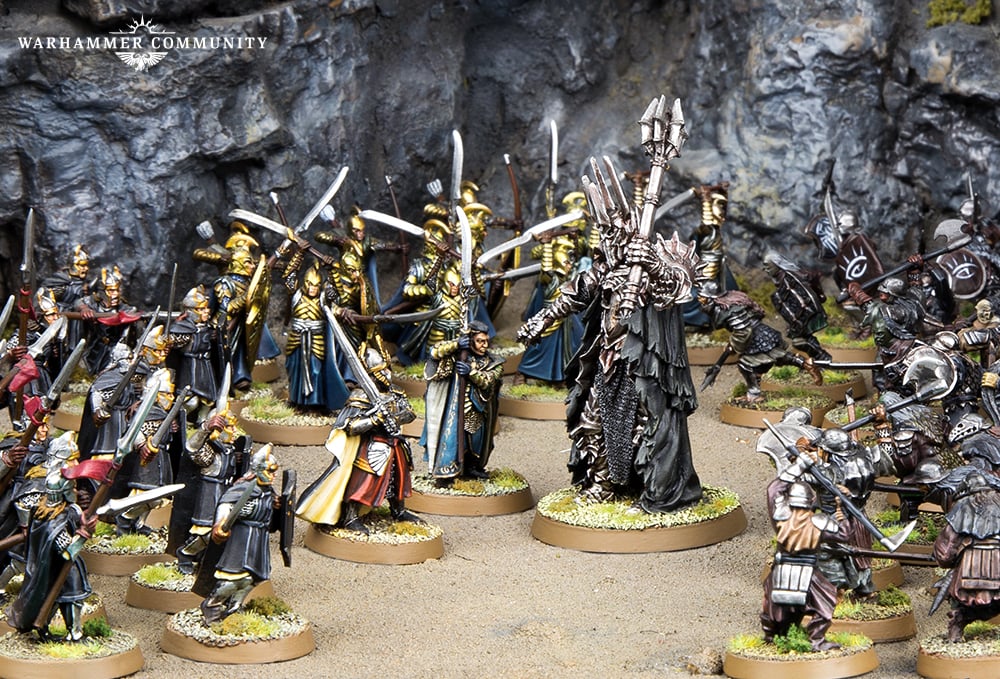
Ideally, you want Sam fighting alongside someone else (like Aragorn in the picture above) – at
which point, his Might points can be used to boost his die rolls. With the
reroll from Bill, Sam has a 0.75 probability of getting a 4 or higher on his die
to win the Dueling roll, which means he should be within 1-2 Might points of
getting a 6. While 1-2 Might spent by Aragorn, Boromir, or Gimli will undercut
what they can do later in the game, Sam is an ideal candidate for spending his
Might this way. In addition, if you’re relying on him to call a free Heroic
Combat to sling a power hero somewhere else (and Sam to help Frodo), you can
boost your rolls in addition to the free Heroic Combat if you need to (it’s not
restrictive, like Heroic Strike is).
So, how do you use Merry and Pippin if their job is to “keep
Boromir from getting swarmed?” Easy: keep them within 0.5” of him so that only
a handful of models can charge him. With this general rule, you have two
formations you can run: a spear-tip formation (shown above) where Boromir stands about a
half-base ahead of the Hobbits, exposing himself to more foes but the Hobbits
to fewer foes. Personally, I think you want to use this formation if you’re
running into a warrior-heavy line and powerful heroes/monsters are not nearby,
since Boromir has a chance to excel against normal Warriors.
The Fellowship is full of powerful heroes – heroes who are in many ways the top of their class for what they do. Who can kill as many models (no matter how high their Defense or Fight Value stats are) as Aragorn? How many archers can out-shoot Legolas? What heroes are as tough to crack as Gimli (okay, there are a few tougher than him, but none are at his cost level)? Who can out-Might Boromir (besides Aragorn and Azog on the White Warg – both of who cost a good bit more than Fellowship Boromir, by the way)?
Yes, the Fellowship has lots of powerful heroes. But these
powerful heroes can only do so much – Aragorn will often use his free Might
point each turn to call that needed Heroic Move or Heroic March or Heroic
Strike, but he can’t call all of them for free in the same turn (and what if he
needs to boost a die to win a fight?). Legolas can be lethal from a distance,
but there are times when he’s going to let you down (either because the targets
are tough or because terrain obscures the perfect shot). Gimli can deal a lot
of damage and take a lot of damage, but eventually the crowds will press and
crush him. Boromir is a great hero, but with Defense 6, 3 Wounds, and 0 Fate
points, he can be incredibly fragile. To solve this problem, the Fellowship
must rely on four (or five?) of its members: the Hobbits. While their profiles
aren’t as impressive as the rest of the Fellowship, they fulfill an important
part of the army’s need: something cheap to hold off part of the horde to allow
your power heroes time to “do their thing.”
In many ways, the hobbits are my favorite part of a
Fellowship army – not because of what they can do, but because they never cease
to surprise me. Let’s take a look, shall we?
Frodo Baggins: The
Core of (Almost) Any Fellowship Army
As I mentioned in a post on the
One Ring I did recently, Frodo has the One Ring – let’s start with that.
While basically all other Ringbearers will have the Ring before Frodo does,
most Ringbearer characters are rarely used in our gaming group (and I’d guess
are pretty rare in other gaming groups too). Should Frodo have the Ring (and be
wearing it), he goes from being an “okay” hero to being a great one – hard to
charge, impossible to shoot, and undercutting the Fight Value of anyone he charges
(or who charges him) while he wears the Ring. While Frodo can take other gear,
the Ring is his most important asset – so let’s just assume he has it for our
examples today.
To Mithril or Not To Mithril?
Mithril mail is a 15pt upgrade for Frodo (bringing him up
from 60pts to 75pts). This is a good upgrade, but is expensive in a Fellowship
list. While we’ll be looking at some sample lists a little later, bear in mind
that if you’re planning on running Frodo alongside the five mega heroes
(Gandalf, Aragorn, Legolas, Gimli, and Boromir), you’re looking at paying a
minimum of 685 just for the six models. With the option of getting a shield for
Boromir and armor for Legolas and Aragorn, you begin to ask the question: is it
better for Frodo to get +3 Defense? Or for three other heroes to get +1
Defense?
Personally, I think the mithril mail is a good upgrade for
someone like Bilbo Baggins in the Shire/Rivendell list to take, but for Frodo,
I don’t think it’s that necessary (unless you’ve got the points – then why not).
If you’re wearing the Ring and are NOT fighting someone, you will be immune to
(most) spells, immune to archery, and will only be attacked in melee if someone
slingshots into you with a Heroic Combat (which will require a Courage test
with a penalty).
If Frodo IS fighting someone, you’ll half the Fight values
of anyone that you’ve Engaged in combat (though not their spear support). Frodo
can’t call heroic actions while wearing the Ring, so you can’t use Heroic
Defense to keep yourself alive. You can, however, bring someone else into the
fight (or keep Bill nearby to give Frodo a reroll). So long as your target is
below Fight 7, you should be able to force a roll-off or win ties (especially
if you take Sting). I recommend using his Might to boost rolls to keep him
alive.
Front Rank or Second Rank?
While Frodo is fine at fighting, there might be a situation
where you know you’re going to be overrun by attackers – and if your opponents
have good Courage or a special rule that makes them auto-pass Courage tests,
you might want to follow the tactic used at the end of the Fellowship of the
Ring: Frodo runs while the rest of the Fellowship keeps the assaulting force at
bay. Frodo doesn’t provide any auric abilities to the Fellowship by standing
near them (not like his nine-fingered future self), but he does make his
companions Fearless (and unbreakable) while he’s alive. While walking into
something big while wearing the Ring is great (especially if you’ve got
Aragorn, Boromir, and/or Gimli in the same fight), sometimes, you just need to
keep Frodo safe and out of trouble.
When To Put On The Ring?
Putting on the Ring is tricky: obviously it provides many
great benefits that we’ve already discussed above (immunity to basically
everything except melee damage, hard to charge into melee, suffer from halved
Fight Value once you’re there). Yeah, it’s awesome. Except…
When Frodo wears the Ring, he suffers from two critical
things: first, he can’t call Heroic Actions, so if he does get in over his
head, he can’t call Heroic Defense (which is a marvelous way of getting out of
a tight spot). The second problem that you face is that there’s a chance that
you won’t be able to move Frodo where you want him to go – your opponent will get to do that. Since
Frodo can charge enemy models while under the control of the opposing player,
drifting too close to any kind of combat hero/monster is a bit of a bad plan
(or even being too near the center of a block of spearmen). As noted in a
previous post on the One Ring, Young Bilbo is the only Ringbearer who
doesn’t suffer from either of these rules – we’ll talk about him when we look
at Thorin’s Company in a future workbench update. :)
 |
| That moment when you're like "I'm so happy I have the Ring right now..." |
- When you near the enemy: if you’ve foregone the Mithril Mail (and especially if you’ve ignored taking that AND an Elven cloak), the Ring is the only thing that will keep Frodo from being shot up quickly by enemy archery (and since he’s the key to keeping your army from being Broken AND making them all Fearless, make no mistake: he’ll be the target). You can make some of your other models more tempting targets, but anyone who has a clean shot at Frodo is going to take it. As I said above, only leave the Mithril Mail at home if you don’t have the points for it – and there are cases where you don’t have the points for it – but even the Elven cloak can provide you some decent protection against charges/archery/magic if you can keep any kind of terrain between you and your opponent (it pays to be short sometimes);
- When you near the enemy (cont): the other reason you might need to put the Ring on early is if you are lacking Gandalf the Grey (who can mitigate archery pretty effectively and Magic even more so) or if you’re nearing the enemy and you don’t have enough of the “Fantabulous Four” heroes (Aragorn, Legolas, Gimli, or Boromir – more on them next week, and see how I avoided copyright infringement?) to keep Frodo from being swarmed. The Ring is great at keeping the hordes from wrecking through Frodo – and if your power pieces aren’t there to do it, you might as well slip on the Ring.
- Only when you need it: If you’ve taken the Mithril Mail/Elven cloak (and if you’ve kept all of the members of the Fellowship nearby), you won’t need to put the Ring on unless you “need it” – to keep the Balrog from ravaging through Boromir by halving his Fight Value, for example. This offers much more flexibility to your team, since you can control Frodo better. In scenarios where you need to get to your opponent’s side of the board, the Ring can also be a clever way to get someone across without making them a vulnerable target (charging Frodo from 2-3” away is really difficult – even for Elves). Facing a cavalry team and don’t want to be cavalry charged from 5” away? Slip the Ring on and stay put for a round – watch those riders try to circle you to make their lives better next turn (and make obvious targets for Aragorn, Boromir, or Gimli).
Samwise Gamgee:
Because Every Hero Needs A Sam
It’s probably an unplanned maxim but…
The Fellowship of the Ring is no exception – Samwise Gamgee
is integral to the Fellowship team for two critical reasons: first and
foremost, he allows you to bring Bill the Pony, who is not only capable of
paying for himself with free Might/Will/Fate points via Second Breakfast, but
also because he makes your Hobbits more competent in combat thanks to them
treating him like a banner. All good combat heroes have at least 2 Attacks –
and if you only have a handful of heroes, it’s best to have as many of them as
possible rolling more than 1 die. So…take Bill.
But Sam is great for a second reason: 2 Might points. While
you can always call a Heroic Move with Sam if you need to, Sam can use Might
for three important things: Heroic Strike, boosting combat rolls, and Heroic
Combat (which might potentially be free). Sam has access to Heroic Strength,
but with a single Attack die (unless the guy you’re attacking is on the
ground), you’re unlikely to get any benefit from boosting your Strength value that
you wouldn’t get by promoting your die (see a
post I did in February 2019 on Heroic Strength for a deeper
explanation…though you can see the benefits of Heroic Strength to other heroes
in a series Rythbryt did here).
Heroic Strike is rare for most armies these days – but not
for the Fellowship! Unlike most armies, 6 of the 11 profiles in the army list
have access to Heroic Strike (which is head-and-shoulders above most army lists
and only falls behind Erebor Reclaimed, Thorin’s Company, and Minas Tirith
lists that run lots of Knights of the White Tower). Heroic Strike is good on
combat heroes who need an edge over something strong, but for Sam, it’s more of
a ditch effort. If Sam needs to get into Frodo’s combat, he won’t be calling a
Heroic Strike – he’ll be calling a free Heroic Combat. If Sam finds himself
calling this, it’ll be to stay alive – but that means that normal grunts can’t
be relied on to kill this Hobbit (which is good – you want enemy heroes taking
a swing at Sam so your power heroes can chew through grunts nearby). While
Sam’s Defense 3 makes him appear quite vulnerable, with 2 Fate points and 2
Wounds, he’s actually more resilient than many average-Defense captains. With
Bill nearby to restore Fate points, Sam can take quite a beating before he goes
down (and that’s if he doesn’t win any fights).
 |
| Sneak at a new Aragorn model - more surprises in a future workbench post! |
As alluded to above, the Heroic Combat is Sam’s bread and
butter on the team – all-hero teams need to have their power heroes killing 3-4
models each turn in order to keep pace with enemy horde armies and Heroic
Combats are the best way to do it. Calling a free Heroic Combat with Aragorn is
great, but if you needed the free Might point from Mighty Hero to call a Heroic
Move, you’re going to need Sam to catapult Aragorn into the frey OR burn
precious Might from Aragorn’s store. Your choice, but I’d rather have Sam
around to make life easier (especially if he’s willing to boost his own roll
with Might).
While there’s been a good bit of discussion about what to do
with Sam, using him is actually pretty easy: you want him, Bill, and Frodo to
make a triangle: Sam staying within charge range of whoever Frodo is fighting (I
recommend a 1.5-2” gap between them so Sam can get to the other side of Frodo
if he needs to) and Bill standing between them about 2” away from them so that
there’s no hindrance to Sam’s movement when he needs to charge into Frodo’s
fight.
Meriadoc Brandybuck
& Peregrin Took: Thing 1 and Thing 2
Sam and Frodo have very clear purposes in this army. Merry
and Pippin on the other hand have one purpose and one purpose only:
Merry and Pippin can keep Boromir from getting
overwhelmed. If that’s not an issue for you, leave them home.
For their cost, Merry and Pippin are very good heroes – they
cost the same as Fredegar Bolger and while he can 6 warriors to battle, these
guys are armed (with daggers – occasionally good for Feinting) and can borrow
Boromir’s Might to make sure they win fights (I would only worry about using it
to Wound people if the kill makes a difference). Compared to non-heroes, they're less of a bargain: at 10-points each, Uruk-Hai Warriors with shields, High Elf/Galadhrim Warriors with shields, or Guards of the Fountain Court cost the same and are all better warriors across the board and only lack that single Fate point (which may not even work). Other factions have models that are going to be better than these Hobbits too for fewer points. Whether you're comparing Merry and Pippin to the units your opponent will be bringing (or to gear items for other members in the Fellowship list), I’m not sure they’re worth it.
When I first got started, Merry and Pippin were
auto-includes because the most important metric for my army creation was
numbers – and for half the cost of anyone else, you could get 2 extra heroes
(which automatically raises your Break Point). Then the Warband book came out
and Frodo made it harder for you to break if Frodo was alive . . . and then the
new rules came out and Frodo made it impossible for you to break if Frodo was
alive. So . . . how important is it to have two extra models?
From a break perspective, not that important. From a
keep-the-hordes-off-our-killing-piece-so-he-doesn’t-accidentally-lose-and-die
perspective? Huge. Merry and Pippin have profiles that are “fine:”
- They’re Fight 3 (which will roll-off against some units, beat some units, and keep many of the other units from Feinting – all of which are good things);
- They’ve got decent Courage which is promoted to being Fearless so long as Frodo is around; and
- They’ve got 1 Wound with 1 Fate point (which can be boosted if they’re near Boromir) which makes them a little more resilient than your normal warrior.
One of the other things I used these guys for when I first
got started was to sit on objectives. Since most of our gaming group
prioritized numbers, we saw very few cavalry models fielded and (for reasons I
don’t know) many armies didn’t field a lot of archery. While I might be able to
take some credit for getting some of our players to include more archers in
their armies, the introduction of cavalry was largely due to one of our players
(pre-MESBG) deciding “I want all my Rohan guys mounted” and the addition of
Rythbryt who decided that “a horse made everything better.” And now, leaving a
single 1 Attack Fight 3 Hobbit alone on an objective is . . . probably not the
best idea. In fact, leaving anyone alone is probably a bad idea (though Legolas
has a better chance than most at holding his own against most everything that
comes).
 |
| Okay halflings - just like we did it in the movie (but without the me-dying-and-you-getting-captured part)! |
Your second option is to make a straight line (basically the same setup as above, but moving Merry and Pippin in line with Boromir). This makes the
Hobbits more vulnerable but Boromir is limited to fighting 1-2 foes, which is
better if there’s a big hero head-hunting for Boromir. Unlike the last
formation, this formation is distinctly defensive in nature – you’re holding a
choke point from your opponent and (in an ideal world), you’ll have anchored
your battle line for the Hobbits between two good pieces of terrain. In
scenarios like Fog of War, your opponent will get to choose one of your heroes
to kill – and while he could choose Merry or Pippin, someone might choose
Boromir (given his lack of Fate points and only moderately high Defense). While
the Hobbits will have a harder time of surviving, having Bill nearby (ideally
touching Boromir so he can regrow Might points on turns when he’s charged) will
make them a bit better at fighting (and if they, like Sam, can get a 0.75
probability of getting a 4 or higher on their dueling die, they shouldn’t need
too much Might from Boromir to beat an opponent’s roll – assuming you’re at
even/better Fight value).
Smeagol: A “Decent”
Fighter
Smeagol’s place in the Fellowship roster is a little weird
to me: for 30 points, he’s cheaper than Sam and gets +1” move, +1FV, +2S, +1D,
and +1A, while the only thing he trades is a much lower Might/Will/Fate profile
(-1M/-2W/-1F). If it weren't for one little rule, Smeagol would be an auto-include in any Fellowship list: Smeagol has the Hobbit keyword, so he could treat Bill as a banner if you bring Bill along (which you should) - and with an "okay" fighter profile –
F4/S4/A2/1M - he wouldn't be a bad supporting fighter for 30 points. Personally, I’m a
bit surprised he doesn’t have Stalk Unseen, but whatever.
However, there's a little rule on the army special rules page that says you can only include Smeagol if you include ONLY Frodo and Sam. Unlike the Warband books, which said the Fellowship could be run as a single warband, the new army book says it is a single warband composed of heroes. This means that by taking Smeagol, we aren't taking Aragorn, Legolas, Gimli, Gandalf, or Boromir . . . basically anyone we'd want to have in the Fellowship list.
However, there's a little rule on the army special rules page that says you can only include Smeagol if you include ONLY Frodo and Sam. Unlike the Warband books, which said the Fellowship could be run as a single warband, the new army book says it is a single warband composed of heroes. This means that by taking Smeagol, we aren't taking Aragorn, Legolas, Gimli, Gandalf, or Boromir . . . basically anyone we'd want to have in the Fellowship list.
As such, I don't see Smeagol as a great hero for the Fellowship to bring along UNLESS you're bringing them in as a small allied contingent to Rivendell/Lothlorien - for 150 points, you can bring Frodo with Mithril/Sting, Sam, and Smeagol, giving you three heroes with pretty good Courage to call Stand Fasts and lending you free Heroic Combats to catapult Glorfindel/Elrond (or Celeborn/Rumil) into better fights, the Ring to knock down Fight Values on important models, and strangling fingers to supplement the attacks on a battle line (and support him with an Elf spearman, of course). They are also three cheap heroes you can ally into a Misty Mountains list (running the three of them, Gwaihir, and 4 Great Eagles at 700 points will boost the number of models required to break you dramatically) - though I think you'd be better off with Dwalin and Nori/Dori as I've discussed in a previous post. Probably the best alternative, however, is to bring these three guys as part of the Rangers of Ithilien Legendary Legion, helping Faramir and all those Rangers deal with the tough foes you face (basically doing what was just laid out above).
Sample lists: Frodo Baggins, Samwise Gamgee, Meriadoc Brandybuck, and Peregrin Took
Point Limit
|
Army List
|
What’s in this list?
|
450pts
– Get Out of the Shire
|
Frodo Baggins
Samwise
Gamgee
Meriadoc
Brandybuck
Peregrin Took
Convenient
Alliance: The Wanders in the Wild
Tom
Bombadil
Convenient Alliance: The Shire Fredegar Bolger
Historical
Alliance: Rivendell
Gildor
Inglorion
3
Noldorin Exiles with Elf bows
1 Noldorin Exile with Wood Elf Spears
2 Noldorin Exiles with Wood Elf Spears and Throwing Daggers
2
Noldorin Exiles with Throwing Daggers
|
In a small game, you’re unlikely to run into very many armies that
field 2-3 powerful units you need to deal with. Tom Bombadil helps you very
easily tackle any one model you face, but Gildor Inglorion (and Frodo while
wearing the Ring) provide another way of dealing with 1-2 models.
We've also included "Fatty" Bolger because, in the books, he plays an integral role in the starting of the company (making it seem like they settled in Crickhollow and throwing the Ringwraiths off the trail of the others) - and those who know the books well know that Fatty joins the company before Merry does, so it only seemed fitting to include him here.
Fatty and the rest of your models (8 Noldorin Exiles and 3 Hobbits) are really
just screening for these guys, buying as much time as they can for Gildor to
do some killing, Tom Bombadil to do some healing/Might regeneration, and Sam to
do some Heroic Combatting. Seven of the Elves can shoot thanks to Elf bows and
throwing daggers, so you should have a reasonable presence for archery and
Tom Bombadil can cast Banishment should you run into any Spirit models that
need bashing.
|
685pts– The Breaking of the Fellowship (Book Version)
|
Frodo Baggins with Sting, Mithril Coat, and Elven Cloak
Samwise Gamgee with
Meriadoc Brandybuck
Peregrin Took with
Aragorn
– Strider with Anduril, bow, and Elven Cloak
Legolas
Greenleaf with Elven Cloak
Gimli,
Son of Gloin with Elven Cloak
|
No Gandalf or Bill in this list - if you were running a more competitive list, you'd drop two Elven Cloaks to get Bill (since we didn't spend all our points) and you'd probably drop two more to get armor on Aragorn and Legolas.
Still, all of your models can be "invisible" behind terrain and you've got two archers in your team (three if you include Gimli's throwing axe and seven if you also include the thrown stones from the Hobbits). Aragorn wields Anduril (because in the books, Aragorn gets it in Rivendell before they leave), which will help even the odds tremendously.
|
Conclusion
We’ve covered the auric support heroes and the “Hobbit”
heroes already – and there’s lots to learn and lots to gain from running these
guys, but in our final post, we’ll be covering the four combat heroes from the
Fellowship in our next post (Aragorn, Legolas, Gimli, and Boromir). If you like
using the Fellowship army list, it’s probably because of these guys.
Glad you mentioned Sam’s surprising resilience. He’s surprisingly tough to take out, although he’s at his best slingshotting another power hero forwards with that free Heroic Combat. The Fellowship’s “Free X” potential is crazy.
ReplyDelete