 |
| Dwarves charge towards an army of Goblins... |
 |
| A wedge formation of Dwarf Warriors, led by a Khazad Guard... |
 |
| And a big fight underground on a very small map... |
|
| Dwarves charge towards an army of Goblins... |
|
| A wedge formation of Dwarf Warriors, led by a Khazad Guard... |
|
| And a big fight underground on a very small map... |

 |
| The three models who have not received conversions (left to right): Fili, Gloin, and Kili. By and large, no major changes are planned for these units, but I'm undecided on that one. Gloin's axe will probably be receiving some putty to make it more like his axe in the picture above, and I've thought of giving swords in sheaths to Kili and Fili. Kili's left hand might be chopped off and turned a little for a more dynamic pose (and to distinguish him from his identical unit more). |
 |
| Bifur (left) received the top of Nori's (right) bow shaft. Nori then got the mace top from a Dwarf Warrior (more on him later). In the images from the upcoming movie, Bifur has a bill weapon and a little putty has been added to give him that weapon. Nori wields a mace-head flail in the movie and will be losing the arrows on his back. |
 |
| Oin, Dwalin, and Bombur received small conversions to their weapons. Oin's axe head went to one of the newly-edited Khazad Guards. Dwalin received the hammer-head from one of those Khazad Guards and will be further edited to resemble the hammer he wields in the movie. Oin took one of the base parts from Kili (who got a wood base, as seen above) and that will be fashioned to be more of a club-head as seen in the pictures. Bombur wields a laddle and has an axe on his back (made from the rest of Kili's base and the axe head from Dwalin). |
 |
| Two of the Dwarf Warriors with two-handed axes have been given bows. The one to the left received the bow pieces from the Goblin Shaman model (converted archer), while the other Warrior (center) received Ori's bows (right). Ori's arrow tops were cut off and given to the Warrior, who carries them into combat, bow hanging on his back. Ori has received some putty to cover his head (and quiver) and his axe was given to him from Bombur (where his laddle is now, see above). I'm thinking about changing his hand's position to hold the axe horizontally, instead of vertically, but we'll see. |
 |
| The final members of the company are (left to right) Dori, Thorin, and Bofur. Dori carries a sword, which came from one of the jumping Goblins. The sword will be reshaped to imitate the sword he carries in the pictures, but this change is forthcoming. Thorin changed his sword arm with a Rohan rider (thanks Glenstorm) and has one of the axes from a Khazad Guard (got the axe from the center Dwarf Warrior with bow above). This axe will be edited to imitate the axe he carries in the picture at the top. Bifur's axe has been edited to resemble the hammer-mattock weapon he carries in the picture at the top. A little putty will be added to the back of the weapon to make it smoother. |
 |
| small bits of modeling clay can be used to add additional details to your miniatures--like this troll's bling--for some additional panash |
 |
| when your army consists of vast quantities of basic troops, changing things up now and then can really help make your army pop on the tabletop |
 |
| minor (or sometimes full) conversions of miniatures, and/or special attention to base details will help your heroes stand out from the horde, giving them the chance to attain the glory they well deserve (until they wiff their dice roll at least) |
 |
| with patience, practice and a steady paintbrush, there is no end to the realism you can bring to this miniaturized scale (it also helps to have a personnel consultant on hand to point out when your steeds have "utterly impossible" coloration issues) |
 |
| The Dwarves have finally gotten their long-awaited reinforcements: Dwarf Rangers in anticipation of the new Hobbit movie coming out Christmas 2012. The objective will be to transform twelve of these twenty four warriors into characters from the new movie, increasing the hobby tasks I have to do and adding some special flavor to the fights I will wage. Armies that face the Dwarves beware, as these bearded fellows look for a fight (and if you'd like to see them in action, watch for a post between me and my good mate Glenstorm coming soon)! |

 |
| Here you can see the armies beginning to close on each other. As the evil forces have the only volley teams left in the game (Elves lost theirs on the second turn), the forces of evil have crossed the field with impunity. Technically, I suppose, we could have sat back and fired all day, but the Goblins are firm believers in not having a strategy. There is a huge melee block of Elves to the bottom right and several moderate contingents of Rohan Warriors on the rest of the field. The woods near the center-right of the picture hold a group of Elven archers (no surprise, right?). The forces of Moria (bottom) and Harad (left) approach a ruin in the middle, hoping to get some quick fighting in. |
 |
| As is the case with most volley rounds, this Shoot phase was fairly uneventful. Two Rohan Warriors died, but that was about it. |
 |
| Here we are at another move phase. The Goblins have charged into the ruins and are seeking cover behind the walls. The Troll, who arrived first to the ruins, is looking for cover behind the building from Legolas' keen bow (he's perched in a tower on the opposing side). None of the other armies are really opposing the Goblins right now, which makes me happy. |
 |
| The one thing about not having priority is you get to see your units killed first. The Galadhrim archers fired into the ruins and slew two Goblins, scoring the first kills for their side. |
 |
| Legolas and one of his companion Wood Elves would not be beaten in this contest and each scored another kill, bringing the total kills for the forces of Good to four. Not pictured here, the forces of evil killed four Elven spearmen (two killed by Goblins, two killed by Haradhrim). |
 |
| I didn't get a map picture for this turn, but the Riders of Rohan did something unexpected. They charged head-long towards the archers of Harad. Eomer led them in a column formation, blocking most of the archers from seeing his men behind him. At this close range, the archers leveled their bows, took aim, and loosed a barrage. All of the horses and riders survived the hailstorm, which led Centaur to be rather happy with his maneuver and give it the thumbs-up that you can see at the top of the picture. You will see why this maneuver paid off in full next turn. |
 |
| While the Haradhrim were busy doing nothing against the riders, the Goblins were making up for lost time. They scored four or five volley hits against the center formation of Rohan Warriors and succeeded in killing two Galadhrim archers and two Rohan Warriors. I was very pleased with my volley team, as 14 Goblins can manage to deal a lot of damage if given the chance. Added to their two other kills, the Goblins have killed a grand total of six units and a combined 50 points (which almost pays for the volley team itself)! I think during this turn, the Witch King attempted to cast "Sap Will" on Galadriel. He rolled a 1 on the one dice he used and didn't feel like using both of his Might points (1/10 Will). |
 |
| So, two turns in a row I've forgotten to take a map picture (can you blame me, I was enjoying the game!). The Goblins, as you can see, made it to the ruins and began to reinforce their position. Eomer and his cavalry are now safe from Haradhrim archery and approach the ruins. The Elves, however, pour arrows into the Goblins, landing one wound on Durburz. Legolas uses his keen archery skills and nails the Troll, dealing him his first wound (1/3 Might used). Elsewhere on the field, the Haradhrim killed one Rohan Royal Guard. |
 |
| The forces of Good are charging and we have our first melee fights (it's about time...time passes so quickly on these blogs). The Witch King targeted Eomer with a "Transfix" spell, which he spent two Will casting (3/10). |
 |
| The Elves score two kills with their throwing daggers, nailing a few Goblins before the fighting begins. The archers from Rohan killed a Haradhrim archer, as did one Galadhrim archer. |
 |
| Legolas shot into the combat with the Troll and wounded the Troll again (2/3 wounds, no Might used). Eomer called a heroic combat but lost it (1/3 Might), as the Goblin fighting with the Troll rolled a 6 and the Troll had a higher fight value. It is interesting to note here that if the Goblin had been killed by Legolas instead of racking up another wound on the Troll, Eomer would have won the fight...and possibly killed the Troll. Good Goblin. The result was that the Troll killed Eomer's horse and dealt two wounds to the famed hero. Eomer took one of them and saved another with a Fate point (1/3 Fate). In the nearby fight, you can see that the Rider of Rohan killed the Goblin he was fighting. This fight was a no-contest in every respect. |
 |
| My Goblins are attempting to build a strategy for fighting these Elves and so we pull back just a little. The Troll and a few Goblins are stuck in the ruins (a very tight spot), but besides that,t he fights are looking rather good. Galadriel immobilized the Troll (didn't see that one coming), using her Free Will point and one from her store (1/6 Will). I should also mention that she has her "Cast Blinding Light" spell on, cast in the first turn as normal. |
 |
| The Haradhrim archers take aim at the Rohan Warriors and slay two of them. The archers of Rohan claim another Haradhrim archer and two Galadhrim archers and a Wood Elf archer kill three more Haradhrim. Ouch... |
 |
| ...But even that round of archery was not the worst toll of the round ont he armies of Evil. The throwing weapons of the Elves slew four of the front-line Goblin Warriors, doubling their kills for this round. I'm really not happy right now... |
 |
| In the Fight phase, the Rohan Rider kills one of his foes, which is unexpected. The Troll, however, rolls a 6 on his dice to win the fight and none of his foes roll a 6 (or care to spend the Might to win it). I've never seen an immobilized unit defeat 5 dice on the attack before...that's really neat. |
 |
| Here is where the game gets interesting. The Good forces won the priority this round and charged my Goblins (in a way, that's what I wanted). They slew three Goblins with their throwing daggers, racking up a few extra kills before the Fight phase. Galadriel immobilized the Troll again (2/6 Will + free one) and I'm expecting my Troll to fall in tatters. One of the Rohan Riders dismounts from his horse and Eomer attempts to mount it. On the roll of a 6, Eomer may move the rest of his move distance towards the Troll. As he prepares to charge it, he notices just how large his opponent is and hesitates (failed his Terror test). I'm saved...except for the Rohan Royal Guard I still need to fight (bodyguard rule is very neat). |
 |
| In the Shoot phase, Legolas killed a Haradhrim archer, as did one of the Galadhrim archers. One of the Rohan archers killed an Abrakhan Guard and one of the Haradhrim archers peered through a window at Legolas and loosed an arrow straight and true. At the last minute Legolas blinked (or something) and the arrow missed him (Fate save). In the Fight phase, the Elves had a bitter clash against the Goblins, slaying one spearman and losing one spearmen and two swordsmen. Elsewhere on the field, the Rohan Rider was brought down and killed by the Goblins he was fighting. |
 |
| The armies continue to clash at the bottom of the frame and the armies of Harad are finally getting into the action (just as I'm falling to pieces). Nothing of interest happens in the Move phase, besides the fact that Eomer is now on my side of the battlefield instead of the Haradhrim side...because all I need right now is another powerful hero killing my troops. In the Shoot phase, two Haradhrim archers are killed by Elven archers and another is killed by a Rohan archer. The Haradhrim respond by wounding Legolas up in his tower (no Fate Save). But one other...infinitely more important thing happened in the Shoot phase... |
 |
| Oh bugger...yes, this was by the keen blonde archer in the tower, who paid his second Might point to kill him. Things are officially pretty bad for the forces of Evil. You can see in this picture, though, that Haradhrim Warriors have begun to reinforce my flank. Yaye. |
 |
| Pardon the blurriness. Eomer called a heroic combat with one helping Rohan Warrior and he successfully kills him (3/3 Might points used). After five deadly slashes, Eomer and his Rohan companion charged to other fights. |
 |
| Eomer and his Rohan supporter, as you can see, evened out fights against the Elves on this flank. The lone Goblin archer that you see was "Commanded" by Galadriel...so he's kind of out doing his own thing now. |
 |
| In the fights that ensued, Eomer killed the Goblin spearman who was supporting the archer killed earlier. The Elves killed two Goblins while the Goblins returned the favor and killed three Elves. Two other Goblins were wounded in this fight, but the fury of their Shaman caused them to ignore their wounds (6+ Fate Save for the win). Two Rohan royal guards killed yet another Goblin, further increasing the death count in favor of the forces of Good. |
 |
| Here we are again, now closing on the fifth hour of combat (like I said, this game was LOOOONG). The Witch King immobilized Eomer again (7/10 Will) and the Lady of Light has engaged a foe in close-combat. Not much else happened in the Move phase, but in the Shoot phase, Legolas killed an Abrakhan Guard, which should help a bit in the ensuing fights. |
 |
| Three heroic combats were called in the Fight phase: Boromir performed his first (1/6 Might), then Dalamyr (1/1 Might), then Galadriel (1/3 Might). Galadriel killed a Goblin archer with the help of her bodyguards. These men then rushed to other fights, as you will see. |
 |
| On the other side of the field, Boromir killed a Haradhrim spearman (he needed to pay 4/6 Might to do it) and Dalamyr moved past a Rohan Royal Guard (killed with a thrown dagger) and he killed the banner bearer standing in this shot. He then moved on to attack one of the Rohan warriors further in line (see below). The fights here are fairly evenly spread though, so we were anxious to see how the battles fared. |
 |
| Boromir killed his foe and Dalamyr killed his. Besides that, one Rohan Royal Guard was killed. The rest of the Rohan remained steadfast and avoided being killed, which is typical of Centaur's troops. |
 |
| As you can see here, one Rohan Warrior was killed, as was one Goblin Warrior. Not much happened in the center. |
 |
| The Elves fought hard against the Goblins. They killed two of them (Galadriel scoring a second kill) and suffered only one loss in return. |
 |
| I'm quite excited about using the Shaman. I've play-tested a Shaman with Gaius before I started this blog and was impressed, but not to the extent that I wanted to pay $9 or more to get him. Conversion became a good way to get the points I wanted and should make my army much stronger. You'll see in the next picture that his helm is supposed to be a wild warg skull... |
 |
| Since these pictures were taken (just before jumping on an airplane), I began a second round of conversions. You'll see when I post that picture (the ones I've taken get really blurry, so I'm hoping the coloring will change that) that there are now two bags of gadgets for this guy, one of which has a strap. The staff has gotten some filling in so that it looks more like one piece of wood and has a ball on the top...don't know if that will become another skull or not. |
 |
| As you can see from the picture, I used putty to make their face-guards and accent some of the ridges in their helmets. They all have bracers on their arms and once the Dwarf Rangers come, their axes will all be double-bit axes. I'm really excited about all of this and can't wait to use these warriors against an army of Elves in the coming weeks (and against Goblins, but that can wait a little bit). With six Khazad Guards, Balin could be accompanied by an elite unit of bodyguards, for a grand total cost of 161 points! |
 |
| Vrasku's elbow has been in need of help for a while. The crossbow was taken as a spare from my brother Glenstorm's model and was added to the body of a pikeman whose pike snapped in half. The result was a small patch of empty, rough space at the elbow joint of the crossbow warrior and now with a little putty, it's become one smooth space. This will be painted black with a dull shine like the rest of the armor as it continues the elbow guard that Vrasku wears. By far, this one was the easiest conversion to do. |
 |
| This one by far was the hardest of the conversions to do. As you can see in the picture, the Galadhrim archers and the High Elf archers are quite different. As such, I want to make this High Elf archer look just like his Galadhrim cousins and so I'm working on adding armor to him to make him look like the rest of his new kin. This meant adding hand grips to the bow and making armor for both his legs and chest out of putty. Though not a perfect conversion, it's a start. He'll get a new paint job (as will the other Galadhrim archers) to make sure that the army looks the same, but I'm thinking about leaving the white sash intact, as it makes him a unique archer in the army. His helmet will change too, but not today. |
 |
| The map is set up with a lot of walls, field boundaries, rocks, and mineworkings. The walls have been set up to clearly identify a line that shows what is 12" south of the northern board edge. The Fellowship must have three heroes cross this line and have five heroes escape off the southern board edge. If five of the Fellowship are killed (or if Frodo is killed), the Goblin player wins. For the purposes of this game, Frodo is too afraid of Sauron to put on the One Ring. |
 |
| As you can see, Gaius got his 10 additional units this round in my base, so I haven't gone very far. Well, this is shaping up well, don't you think? Gandalf cast Blinding Light, so his archers at least won't be doing much. As expected, nothing of importance happened in the Shoot phase. |
 |
| Gimli and Aragorn called heroic combats during the Fight phase (Gimli 1/3, Aragorn free): both of them kill their targets with the aid of their friends and they break apart across the battlefield. Gimli and Boromir head off to scout ahead, while Aragorn takes on the Goblin archers and Legolas bails Gandalf and Pippen out of trouble. |
 |
| In the other fights, Gandalf uses Glamdring the Foe Hammer to slay a Goblin easily, while Legolas takes out his supporting Goblin with spear. Frodo loses his fight but is not wounded and Sam and Merry both win their fights, but neither is strong enough to break through the tough armor of the Goblins. |
 |
| Gandalf casts Terrifying Aura and now instills fear in the Goblins. 10 more Goblins arrive to the right of my army and I'm hoping Boromir, Gimli, and later Aragorn can sneak past the Goblins. |
 |
| Legolas nails two Goblins in the Shoot phase and evades one wound from six Goblin arrows with a Fate save (1/3). Legolas' arrows rarely fail to pay-off and being able to nail two Goblins when I'm overwhelmed by opponents from the start is a huge help. |
 |
| Aragorn calls a heroic combat (free) and slays the two Goblins he is fighting (1/3 Might). Here you can see the other three Goblin archers who shot at Legolas. Aragorn then proceeded to run north towards Boromir and Gimli. As a side note, I LOVE having Aragorn in my armies because of his free Might point. I've considered building a Rohan army just so I have cheap units to put him with, but we'll see if that ever gets off the ground. |
 |
| In the other fights, Gandalf loses to the two Goblins he is fighting and avoids taking a hit with a Fate point (1/3 - rerolled). Merry and Pippen win their fight and trap their opponent, but unfortunately the shield of their foe gave him the advantage and they failed to wound him (needing to roll 6s to wound against D5 units with the three lesser hobbits is a real pain). Sam and Frodo both lose their fights: Sam's foe shielded and so did no wound and Frodo escaped unscathed. |
 |
| AHHH! The Troll arrived on the roll of a 6, which means he's in my zone...Gandalf called a heroic move to make sure that Troll didn't go anywhere.Gandalf used 2 Will points (free, 1/6) to ensure that the Troll was immobilized. Whew, that was close. I made the decision that I was going to try to kill the Troll while he was immobilized instead of trying to command him away for several turns or try to evade him (that could eat up my Might points pretty quickly, and I get the feeling I'm going to need them). |
 |
| The other moves were a bit predictable: Gandalf and Legolas charged the Troll, hoping to slay him as he is trapped on the rock. Merry and Pippen charged a spearman (who was later aided by a friendly spearman to break up the fight) and Sam charged headlong into two Goblins with shields. Their spear support later wrapped around Sam, trapping him. The only error I made was that Gandalf called the heroic move and not Legolas: Frodo was outside of Gandalf's range and so was engaged by 3 Goblin archers. If this had been done differently (or if Gandalf would have backed up towards Frodo), Sam wouldn't be trapped and the archers wouldn't have reached the combat. Oh well... |
 |
| Nothing happened in the Shoot phase. The Fights broke out like this: Frodo paid a Might point to win his fight and paid another (2/2) to slay a Goblin archer. Sam flew his pan around and scored the needed 6 on his dice to win the fight and slew a Goblin spearman (also on the roll of a 6). Merry beats the Goblin he is fighting, but Pippen loses the fight narrowly, is successfully wounded, and fails his Fate save. The Goblins have claimed their first kill against the Fellowship. Gandalf uses his staff, but Legolas is the one to win the fight and slay the Troll due to him being trapped on the rock. Best part of all - no might used. I'm pretty stoked. |
 |
| The Goblins engage everyone except Gandalf at the Fellowship base and begin to close in on the other heroes racing towards the northern board edge. Gandalf immobilizes one of the archers fighting Frodo and frees Sam up from fighting two enemies. Again, nothing happened in the Shoot phase. |
 |
| In the Fights that ensued, Legolas beat the spearman he was fighting and paid a Might point to kill him (1/3). Frodo loses his fight, but the one Goblin who can wound him is unable to score a blow. Gandalf unleashes Glamdring on another Goblin and slays him easily. Merry is angry over the death of his cousin and wins his fight, but is unable to control his anger and score a blow. Beyond all this, it is Sam who steals the limelight and wields his pan in another flurry against a single Goblin foe. Though he does not score a 6 to win the fight, he wins nonetheless and scores another 6 to wound, this time killing a shield-bearing Goblin. "I think I'm getting the hang of this!" |
 |
| As this turn began, we technically had 10 minutes left, so we were racing the clock. Five more Goblins arrived in Zone 1 at the top of the board and the Goblins continue to close in on Aragorn, Boromir, and Gimli (some are drawing arrows to shoot this round). Gandalf "commands" one of the Goblins nearing the south side backwards to delay the foes a bit, while assisting Merry in his fight. The other fights appear to be manageable. NOTE: we realized just after taking this picture that I hadn't moved Aragorn, Boromir, and Gimli, so I moved them up towards the enemy, since technically the next phase hadn't started. |
 |
| In the Shoot phase, three arrows are loosed and all three clatter harmlessly to the floor. Yaye! In the Fight phase, Legolas does his job and wounds the Goblin he is fighting. Gandalf and Merry fail to wound their Goblin, which is pathetic. Frodo and Sam lose their fight which might be even more pathetic. |
 |
| The Fellowship has manuevered a bit to try to get a better position and Legolas prepares to fire into the new Goblins who have arrived. Gandalf fails to immobilize one of the Goblin archers who charges towards the Fellowship and one new Goblin arrived in Zone 4 to distract Sam and split up the fight. Boromir and Gimli charge the Troll to the north, but Boromir is separated from the fight by two Goblins. Legolas hit two of the Goblins in the Shoot phase, but failed to wound them. |
 |
| Gimli and the Troll roll off after a close fight and the Troll wins. He fails to wound Gimli though, and the tough armor of the Dwarf stays strong. Boromir pays a Might point (1/6) to win his fight and slays the Goblin he is facing easily. |
 |
| Frodo and Sam both win their fights (Sam with another 6), but neither wounds their opponents. Bummer, as more Goblins arrive. Gandalf pays a Might point (2/3) to wound the Goblin he and Merry are fighting and uses his staff to kill him. |
 |
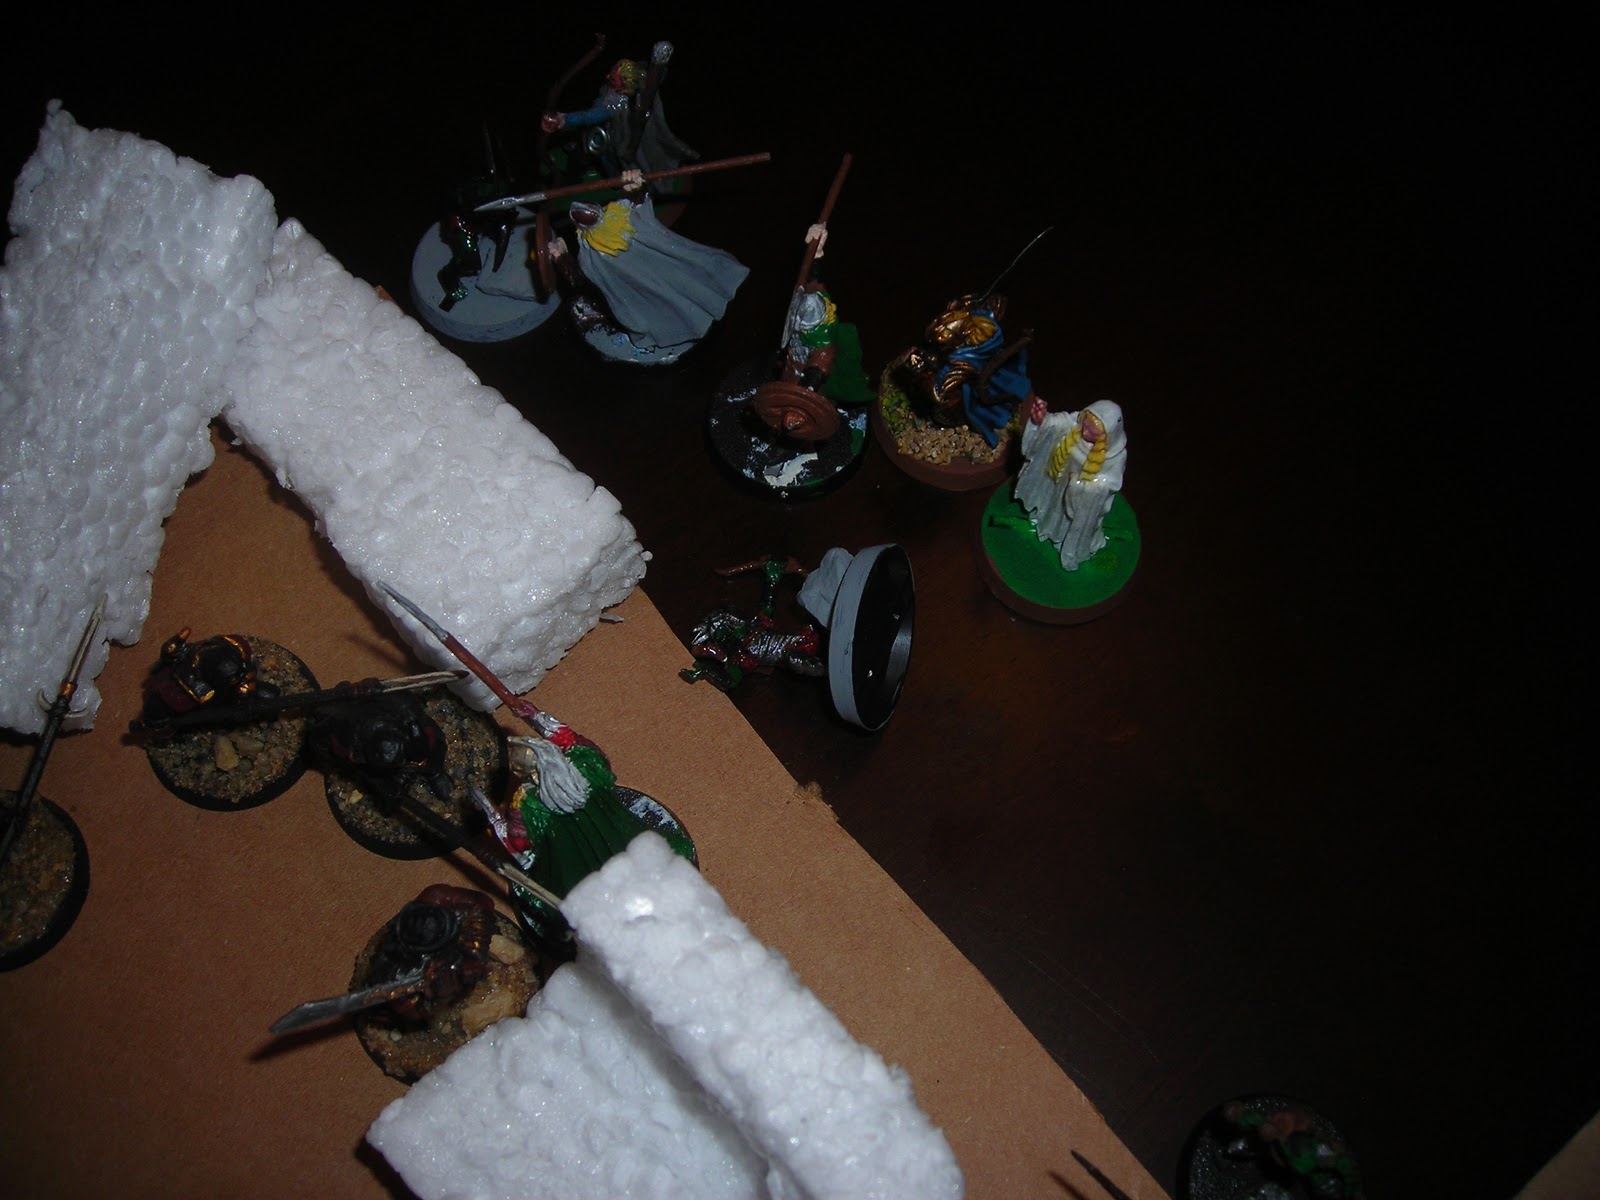
| With this won priority, the Fellowship wins: the three heroes out front cross the line, indicated by the terrain pieces... |
 |
| The three hobbits escape and Gandalf uses 4 Will points (free, 4/6) to ensure that a Goblin archer is commanded away from Legolas and he is free to escape. Gandalf escapes himself and that makes five Fellowship heroes cross the board edge to end the game. I'm sure the Fellowship heroes on the other side of the board would have done well in their fights (with perhaps Boromir dying if the Troll won the roll), but we didn't see a point in finishing the round as the Fellowship already won. |